

Years on the market
Positions in the Top
Created websites
%
Satisfied Customers 🙂

Website development
Website development from simple Landing page, визиток, корпоративных сайтов, catalogs, до крупных online stores with cool style and functionality!
SEO Website Promotion
Выводим сайты в ТОП (а не клиентов из себя ![]() ) Google, Bing! SEO website promotion для любых ниш, любых языков и стран!
) Google, Bing! SEO website promotion для любых ниш, любых языков и стран!
contextual advertising
Быстро получить лиды? contextual advertising в Google подкреплённая ремаркетингом поможет не только получить новые заявки, но и дожать их до продажи!

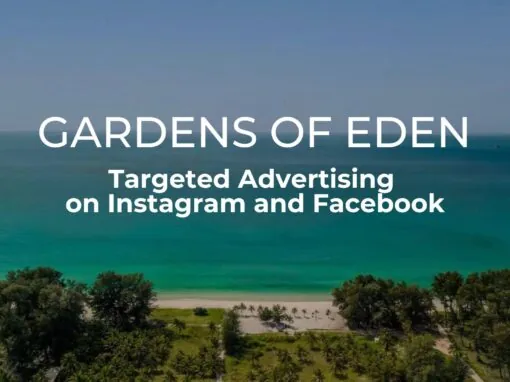
Social media advertising
Targeting advertising бьёт (нежно) точно в цель — в клиента! Отличный маркетинг инструмент для товаров и услуг почти любой ниши, ведь все есть в Facebook и Instagram!
Promotion in Western Markets
Идея продавать в США, Канаде и Европе одна из лучших, ведь, рынки большие и платёжеспособные! А если ты уже «Там» тогда наш услуги под «Бурж» то что твоему бизнесу!

Additional services
Сайт не сделать без домена и хостинга, и не построить отлично работающую компанию без CRM систем! Мы предлагаем только то, чем сами пользуемся!
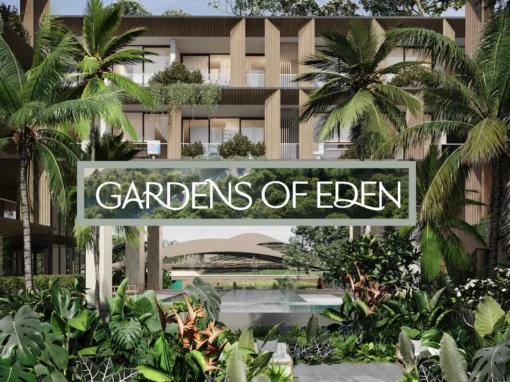
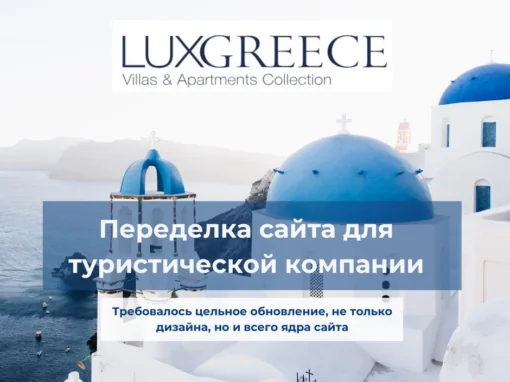
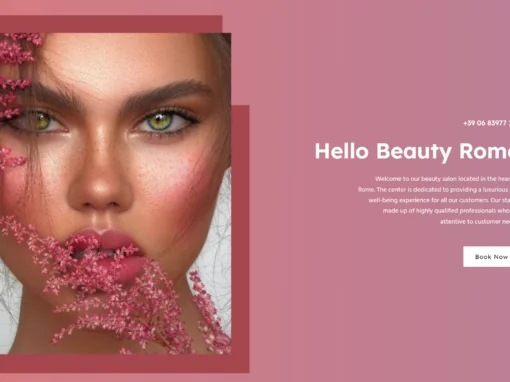
Cases


Our work

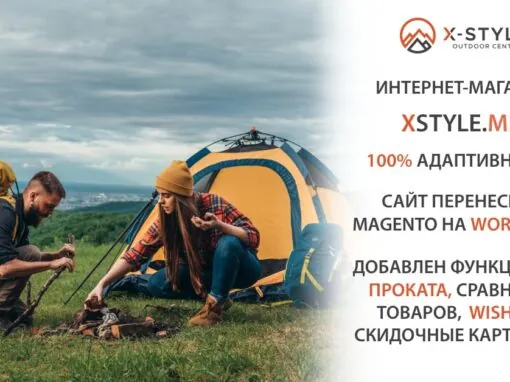
Convenient sites are our profile!
Fresh ideas and new solutions!
The cost of our solutions and services
Geography of our clients
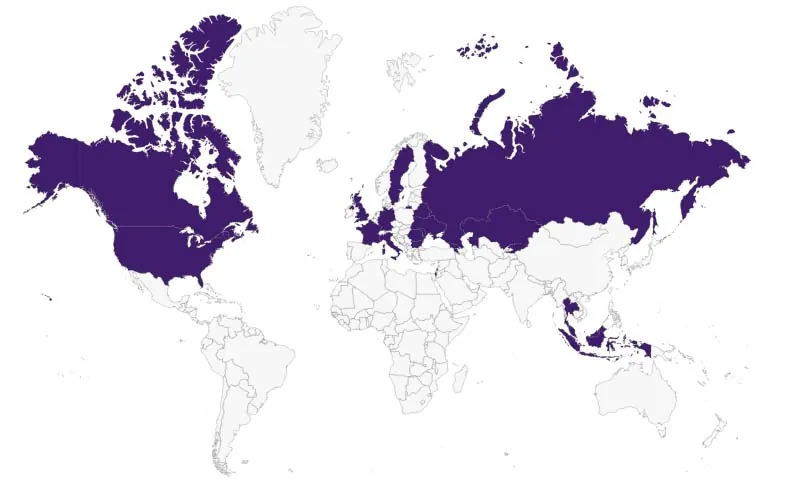
our clients


Blog
Support and advice
Operational work
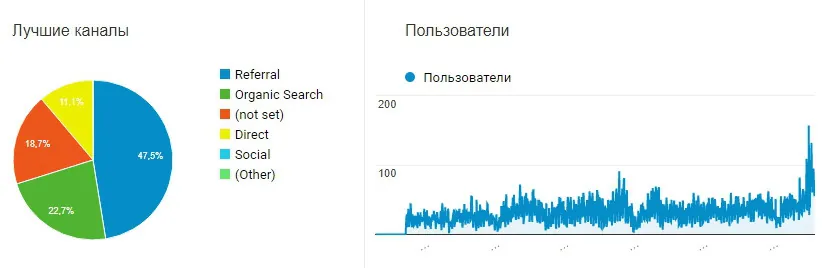
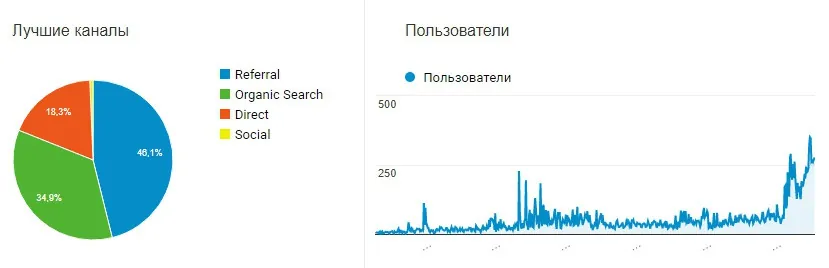
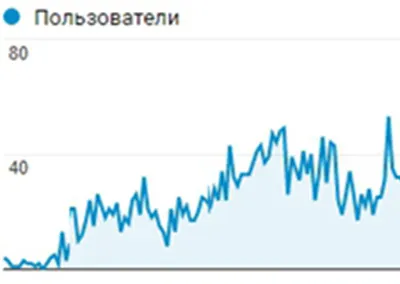
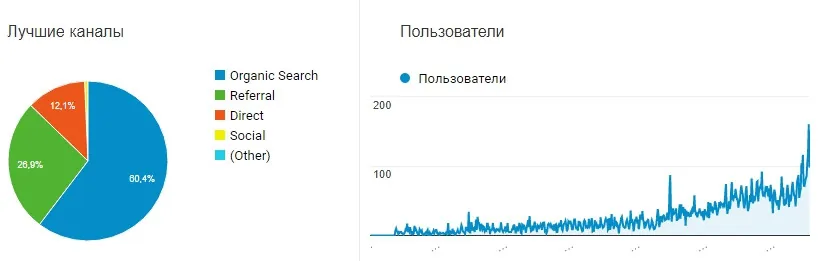
Data analytics
We work using the following services, technologies and tools:
About us
Наша компания основана в 2007 году. Изначально нашей основной целью была интеграция бесплатного программного обеспечения на территории Республики Молдова.
Достаточно быстро эта идея выросла в компанию, предоставляющую полный спектр ИТ-поддержки. Наши клиенты обращались к нам со всеми вопросами: от покупки аппаратного и программного обеспечения, настройки и обслуживания компьютеров, сетей и серверов — до создания веб-сайтов, интернет-магазинов и их продвижения, включая интернет-рекламу и SEO-оптимизацию.
На протяжении последних нескольких лет мы сделали основной упор на интернет-маркетинг: разработку сайтов, вывод сайтов в ТОП поисковых систем, продвижение в социальных сетях и настройку контекстной рекламы.
Благодаря активному развитию интернет-направления мы вышли на международный рынок. Сегодня среди наших клиентов — компании не только из Молдовы, но и из США, Канады, Испании, Италии, Сербии, Азербайджана, Казахстана, Грузии и многих других стран.
Все работы мы проводим максимально прозрачно.
Для управления проектами и взаимодействия всех заинтересованных сторон мы используем систему Zoho, которая позволяет клиентам участвовать в разработке сайта, его продвижении и настройке контекстной рекламы.
Благодаря этому обеспечивается высокая скорость работы, четкий контроль процессов и исключается потеря важной информации.
Мы стремимся предоставлять каждому клиенту сервис и поддержку высокого уровня, именно поэтому нас рекомендуют!